Settings
The tool panel contains settings to control routing behavior. You can minimize the panel by clicking the collapse button to save screen space.Routing Toggle
When routing is enabled, anchor points placed on the map will be connected by a route calculated on the OpenStreetMap road network. Disable routing to connect anchor points with straight lines. Keyboard shortcut:F5
Vehicle & Profile
The icon row at the top of the panel selects the vehicle — Hike, Bike, Motorcycle, Car, Boat, or Rail. Where a vehicle offers more than one style, a row of variant chips tunes it further (for example Gravel vs Road for Bike, or ADV vs Street for Motorcycle). Each profile is tailored to how that vehicle travels — the surfaces and road types it prefers, how fast it goes, and what it avoids. For example, ADV Motorcycle routes through tracks and unpaved roads that the Car and Street profiles avoid:
Beneath the vehicle row you can adjust a few Basic preferences (avoid climbs, avoid busy roads, and more), open Expert mode for the full set of routing controls, and save, share, or import your own profiles.
Routing Profiles
The complete guide to variants, Basic preferences, Expert mode, and saving, sharing, and importing custom profiles (including bringing your own BRouter
.brf).Allow Private Roads
When enabled, the routing engine will consider private roads when computing routes.Creating Routes
Creating a route is simple - click on the map to place anchor points. Each new point extends your route.Plotting Points
- Select the Route Planning tool from the left toolbar
- Click on the map to place your first anchor point
- Continue clicking to add more points
- The route will automatically connect points based on your routing settings
Editing Routes
You can modify existing routes in several ways:- Move anchor points - Drag any anchor point to reroute the segment connecting it with adjacent points
- Insert new points - Hover over a segment to reveal a midpoint marker, then drag it to insert a new anchor point
- Delete points - Click on an anchor point and select Delete from the context menu
When editing imported GPX files, anchor points are created automatically. See Anchor Points below.
Route Tools
The following tools automate common route modification operations:Reverse
Reverse the direction of the route, swapping the start and end points.Back to Start
Connect the last point of the route back to the starting point using your current routing settings. This creates an open loop.Round Trip
Return to the starting point by retracing the same route, effectively doubling the distance.Change Loop Start
When your route forms a loop (end point is close to the start), you can change where the loop begins. Click on any anchor point and select Start loop here from the context menu.Anchor Points
Anchor points are control points that define your route. When you create a route using the routing tool, anchor points mark the key locations the route passes through. The routing engine calculates the best path between these points based on your selected activity type (cycling, hiking, etc).Opening the Anchor Points Panel
- Select the Routing tool from the toolbar
- Enable “Use routing” if it is not already on
- Click the Points button to open the Anchor Points panel
Opening the Anchor Points Panel
- Select the Routing tool from the toolbar
- Enable “Use routing” if it is not already on
- Click the Points button to open the Anchor Points panel
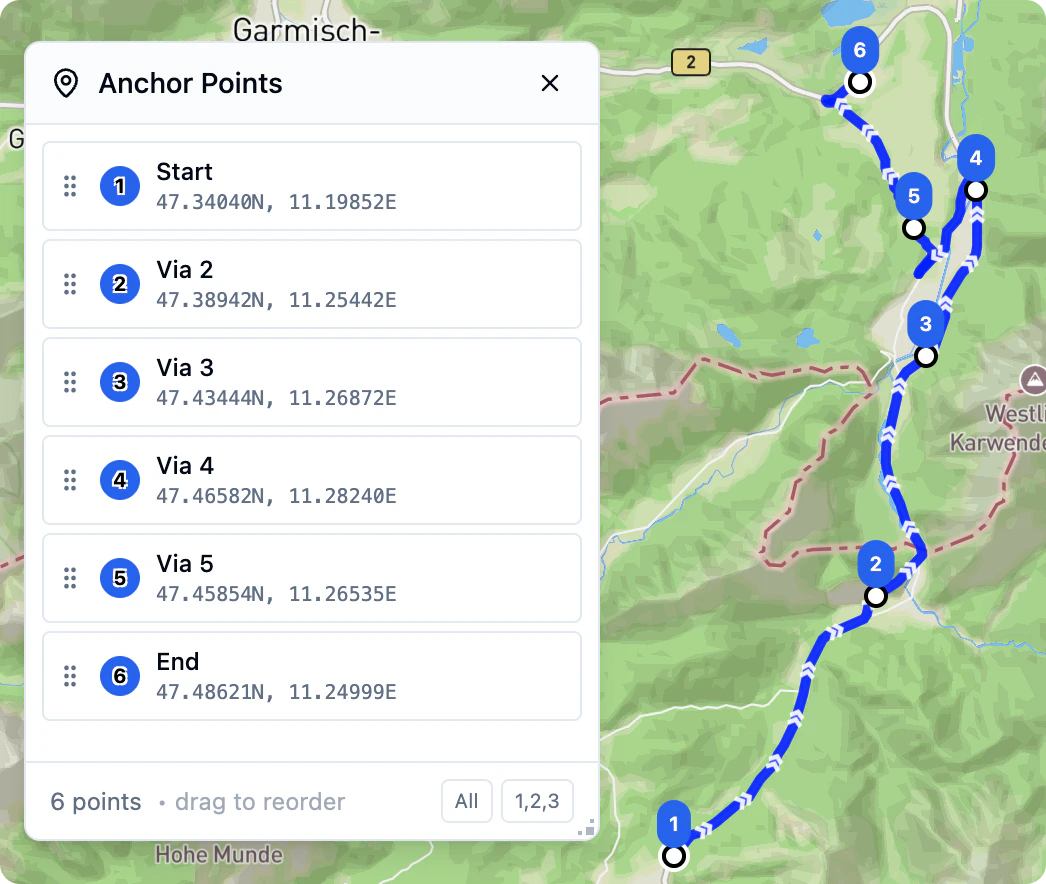
Numbered Markers on the Map
When the Anchor Points panel is open, numbered blue markers appear on the map showing each anchor point in order:- 1 marks the start of your route
- Intermediate numbers mark via points along the route
- The highest number marks the end of your route
Interacting with Anchor Points
On the Map
- Drag a marker to move an anchor point to a new location
- Ctrl+click (Windows/Linux) or Cmd+click (Mac) on a marker to delete it
- Right-click on a marker to delete it
In the Panel
Each anchor point row shows:- A drag handle on the left
- The point number
- The point name (Start, End, or Via) and coordinates
- A navigation icon to fly to the location
- A trash icon to delete the point
- Drag a row by the grip handle to reorder points
- Click a row to fly the map to that location
- Click the navigation icon to fly to the point
- Click the trash icon to delete the point
How Routing Works When Points Change
Moving a Point
When you drag an anchor point to a new location, the route is recalculated. The routing engine finds the best path from the previous anchor point through the new location to the next anchor point.Deleting a Point
When you delete an anchor point, the route is recalculated to connect the remaining points directly. For example, if you delete a via point between Start and End, the route will be recalculated to go directly from Start to End.Reordering Points
When you drag rows to change the order of anchor points, the entire route is recalculated in the new sequence. This lets you quickly reorganize your route without manually moving each point on the map.Control Point Snapping
When you place or move an anchor point, it automatically snaps to the nearest valid position on the calculated route. This ensures your control points always lie on the actual path rather than floating off to the side. The snapping happens after the routing engine calculates the path between points.Tips
- Use fewer anchor points for smoother routes that follow the routing engine’s preferred paths
- Add more anchor points when you need the route to pass through specific locations
- Reorder points in the panel when you want to visit the same locations in a different sequence
- Delete unnecessary via points to let the routing engine find more direct paths